Oven-Baked Buffalo Ranch Boneless Chicken: That Actually Works
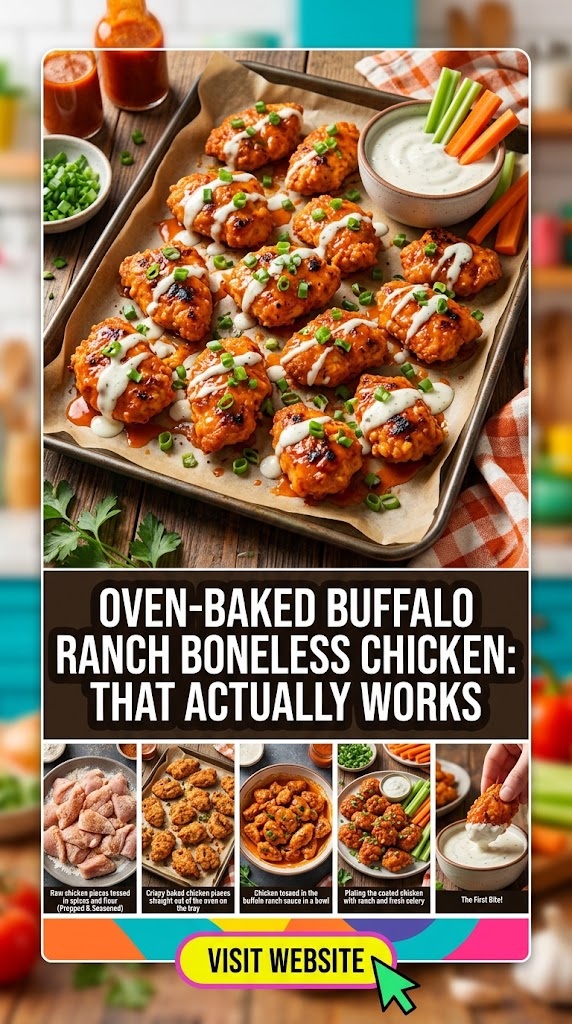
The quest for the perfect boneless wing is often a journey of disappointment. We’ve all been there: you order a batch of “boneless wings” from a local sports bar, only to receive soggy, breaded nuggets swimming in a pool of lukewarm vinegar-heavy sauce. Or worse, you attempt to bake them at home to be “healthy,” and the result is a dry, rubbery piece of chicken with a coating that slides off like an ill-fitting coat.
But what if you could achieve that shattering crunch, that succulent interior, and that iconic tangy-meets-creamy flavor profile without a deep fryer? Welcome to the definitive guide on Oven-Baked Buffalo Ranch Boneless Chicken. This isn’t just a recipe; it is a culinary masterclass in moisture management, heat distribution, and flavor emulsification. This is the version that actually works.
Why Most Baked Chicken Recipes Fail
Before we dive into the “how,” we must understand the “why.” Most oven-baked chicken recipes fail because they ignore the fundamental physics of cooking. In a deep fryer, the high heat of the oil instantly evaporates surface moisture, creating a steam barrier that prevents the oil from soaking into the meat while simultaneously hardening the starch into a crisp shell.
In an oven, heat transfer is much slower. If your chicken is sitting directly on a baking sheet, it sits in its own juices. This leads to the dreaded “soggy bottom.” Furthermore, many recipes use standard breadcrumbs, which are too fine and become dense rather than airy.
To make oven-baked buffalo ranch chicken work, we need to address four pillars:
- Surface Dryness: Moisture is the enemy of crunch.
- Air Circulation: Heat must hit the chicken from 360 degrees.
- The Binding Agent: We need a “glue” that adds flavor and stays put.
- The Emulsified Sauce: Buffalo sauce and ranch shouldn’t just sit on top; they should become one with the crust.
The Anatomy of the Perfect Boneless Wing
The Chicken: Breast vs. Thigh
While “boneless wings” are traditionally made from breast meat, the choice is yours.
- Chicken Breasts: These offer the classic “wing” texture—clean, white meat that acts as a blank canvas for the sauce. However, they are prone to overcooking. To succeed with breasts, we must cut them into uniform 1-inch chunks to ensure even cooking.
- Chicken Thighs: If you want a juicier, more forgiving experience, boneless skinless thighs are the secret weapon. They have a higher fat content, which helps keep the meat moist even at the high temperatures required for a crispy exterior.
The Coating: The Panko Advantage
Forget standard breadcrumbs. To get that restaurant-style “crag,” you need Panko. Panko breadcrumbs are flaky and large, providing more surface area for the heat to crisp up. For the ultimate Buffalo Ranch experience, we actually season the Panko itself with dried ranch seasoning, creating layers of flavor.
The Binder: The Ranch Buttermilk Bath
Instead of a simple egg wash, we use a mixture of buttermilk and liquid ranch dressing. The lactic acid in the buttermilk helps tenderize the chicken proteins, while the ranch provides an immediate flavor hit that permeates the meat.
Essential Ingredients for the Buffalo Ranch Masterpiece
To create a dish that ranks among the best, you cannot compromise on ingredients. Here is what you will need:
For the Chicken:
- 2 lbs Boneless Skinless Chicken Breasts or Thighs: Cut into bite-sized pieces.
- 1 ½ cups Panko Breadcrumbs: For that essential crunch.
- ½ cup All-Purpose Flour: To create the initial dry barrier.
- 2 Eggs + ½ cup Buttermilk: The wet binder.
- 1 tbsp Cornstarch: The secret ingredient for extra crispiness (it helps absorb any escaping steam).
The “Ranch” Dry Rub:
- 2 tbsp Dried Buttermilk Powder
- 1 tsp Dried Dill
- 1 tsp Dried Chives
- 1 tsp Garlic Powder
- 1 tsp Onion Powder
- ½ tsp Salt and Black Pepper
The Buffalo Ranch Glaze:
- ½ cup High-Quality Buffalo Sauce: (e.g., Frank’s RedHot).
- 4 tbsp Unsalted Butter: Melted (this mellows the vinegar and adds richness).
- 2 tbsp Creamy Ranch Dressing: For emulsification.
- 1 tsp Honey: To balance the acidity and help the sauce stick.
Step-by-Step Instructions: The “Crispy-First” Method
Step 1: The Prep and “The Dry”
Start by patting your chicken pieces extremely dry with paper towels. Any surface moisture will turn to steam in the oven, ruining the breading. Once dry, toss the chicken pieces in a bowl with the flour and cornstarch. This “pre-dusting” ensures the wet binder has something to cling to.
Step 2: The Double-Dredge Station
Set up three bowls:
- Bowl 1: The flour/cornstarch-dusted chicken.
- Bowl 2: Whisked eggs, buttermilk, and 1 tablespoon of the ranch seasoning.
- Bowl 3: Panko breadcrumbs mixed with the remaining ranch dry rub and a drizzle of olive oil. (Pro tip: Toasting the Panko in a pan with a little oil for 2 minutes before breading ensures a golden color that the oven sometimes fails to provide).
Step 3: The Coating Technique
Using the “one hand wet, one hand dry” method, dip a piece of chicken into the buttermilk mixture, let the excess drip off, and then press it firmly into the Panko. You want to press the breadcrumbs into the meat to ensure they don’t fall off during the flip.
Step 4: The Elevated Bake
This is the most critical step. Do NOT place the chicken directly on a baking sheet. Instead, place a wire cooling rack on top of a rimmed baking sheet. Spray the rack with non-stick spray. By elevating the chicken, you allow hot air to circulate underneath, crisping the bottom as effectively as the top.
Step 5: High-Heat Blasting
Preheat your oven to 425°F (220°C). Many recipes call for 350°F or 375°F, but that isn’t hot enough to crisp Panko before the chicken dries out. Bake for 18–22 minutes. At the halfway mark, gently flip the pieces using tongs.
The Science of the Sauce: The Buffalo-Ranch Fusion
A common mistake is simply pouring ranch dressing over buffalo chicken. This creates a messy, greasy plate where the flavors compete rather than complement. Instead, we create an emulsified glaze.
In a small saucepan over low heat, combine the buffalo sauce, melted butter, honey, and creamy ranch dressing. Whisk constantly. The fat in the butter and the stabilizers in the ranch dressing will bind with the vinegar-based buffalo sauce. The result is a thick, velvet-like orange glaze that coats the chicken without making the breading soggy.
The “Toss” vs. The “Drizzle”
If you want maximum crunch, drizzle the sauce over the chicken immediately before serving. If you want the authentic wing experience, toss the hot chicken in a large bowl with the sauce for no more than 30 seconds, then serve immediately.
Essential Equipment for Success
To achieve professional results at home, a few key tools make a world of difference:
- Rimmed Baking Sheet: To catch any drips.
- Stainless Steel Wire Rack: Essential for airflow.
- Instant-Read Meat Thermometer: Chicken breast is done at 165°F. Taking it out at 162°F and letting it carry-over cook ensures it remains juicy.
- Tongs: To prevent the breading from being pinched off by fingers.
Nutritional Adjustments and Dietary Variations
The Keto/Low-Carb Version
To make this keto-friendly, replace the flour with coconut flour and the Panko with crushed pork rinds. Pork rinds provide an incredible crunch and are naturally zero-carb. Use a sugar-free buffalo sauce and ensure your ranch dressing has no added sugars.
The Air Fryer Alternative
The air fryer is essentially a high-powered convection oven. If using an air fryer, cook at 380°F for 12–15 minutes, shaking the basket halfway through. Because air fryers move air so rapidly, you may not even need the wire rack.
Gluten-Free Options
Simply substitute the all-purpose flour for a 1:1 gluten-free flour blend and use gluten-free Panko or crushed gluten-free crackers.
Pro-Tips for “Better Than a Restaurant” Results
- Cold Chicken, Hot Oven: Keep your chicken in the fridge until the moment you are ready to dredge. A cold interior allows the exterior more time to crisp up before the middle overcooks.
- The “Rest” Period: After the chicken comes out of the oven, let it sit on the wire rack for 3 minutes before saucing. This allows the steam inside to settle, which “sets” the crust.
- The Butter Secret: Always use unsalted butter for the sauce. Buffalo sauce is already very high in sodium; using salted butter can make the dish overwhelmingly salty.
- Flavor Enhancement: Add a pinch of smoked paprika to your Panko mixture for a “wood-fired” flavor profile without the grill.
Pairing Suggestions: What to Serve with Buffalo Ranch Chicken
This dish is a flavor powerhouse, so your sides should either provide a cooling contrast or a crisp texture.
- Traditional: Celery sticks and carrot sticks are the gold standard. They provide a watery, crunchy snap that cleanses the palate between spicy bites.
- The “Loaded” Route: Serve these boneless wings over a bed of fries, topped with extra blue cheese crumbles and chopped green onions.
- The Healthy Balance: A cold wedge salad with iceberg lettuce, cherry tomatoes, and a light vinaigrette balances the richness of the buffalo ranch glaze.
- Beverage Pairings: A crisp, hoppy IPA cuts through the fat of the ranch, while a cold glass of lemonade or a sparkling ginger ale provides a sweet counterpoint to the buffalo heat.
Frequently Asked Questions (FAQ)
Can I use frozen chicken?
You can, but it must be completely thawed and dried. Frozen chicken releases significantly more moisture during cooking, which makes it much harder to achieve a truly crispy crust.
Why is my breading falling off?
This usually happens for two reasons: the chicken wasn’t dried before the flour coating, or you didn’t let the excess “wet” binder drip off before hitting the Panko. The flour needs to be a thin “glue,” not a thick paste.
How do I store and reheat leftovers?
Store in an airtight container in the fridge for up to 3 days. To reheat and maintain the crunch, use an oven or air fryer at 350°F. Avoid the microwave, as it will turn the breading into a soggy mush.
Is this recipe spicy?
It has a medium kick. The ranch and butter significantly mellow out the heat of the buffalo sauce. If you want it hotter, add ½ teaspoon of cayenne pepper to the dry rub.
Troubleshooting Common Issues
Issue: The chicken is cooked, but the breading is still pale.
- Solution: For the last 2 minutes of cooking, turn on the broiler. Watch it carefully—the Panko can go from golden to burnt in seconds.
Issue: The sauce is too thin and runs off the chicken.
- Solution: You likely didn’t use enough butter or ranch. The fats are what give the sauce “body.” You can also whisk in a teaspoon of cornstarch mixed with cold water into the simmering sauce to thicken it up.
Issue: The meat is tough.
- Solution: You likely overcooked it. Use a thermometer. Chicken breasts can become “woody” and tough if they go past 170°F.
Final Thoughts: The Art of the Baked Wing
The Oven-Baked Buffalo Ranch Boneless Chicken is a testament to the fact that you don’t need a vat of boiling oil to create legendary comfort food. By focusing on the science of moisture and airflow, and by layering the ranch flavor into both the breading and the sauce, you create a multi-dimensional dish that satisfies every craving.
Whether you are hosting a Super Bowl party, preparing a weeknight dinner for the family, or just looking for a way to spice up your meal prep, this method is foolproof. It’s crispy, it’s tangy, it’s creamy—and most importantly, it actually works.
Embrace the crunch, master the glaze, and never settle for soggy boneless wings again. Your kitchen is now the best wing joint in town.